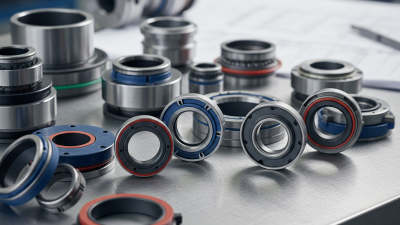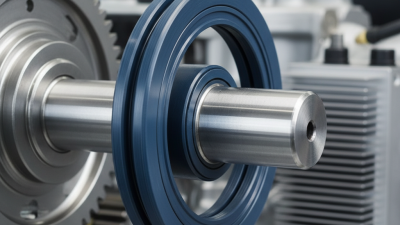
A High Temp Gasket Sealant has a demanding job: it must help seal a joint while facing heat, vibration, and changing pressure. The right choice depends on more than the temperature printed on a tube. Consider the engine or equipment, the materials being joined, and whether the sealant must remain flexible after curing. Small details matter.
A product suitable for a valve cover may not suit an exhaust connection. Check the manufacturer’s temperature range, cure instructions, and compatibility guidance before applying it. Surface preparation matters, too. Oil, old gasket residue, or moisture can compromise a seal, even when the product itself is appropriate. Follow the product instructions, and allow the stated curing time.
This guide shares seven practical tips for comparing formulas and avoiding common selection mistakes. It covers temperature ratings, material compatibility, application conditions, curing, and the demands of the joint itself. Not just the label. Product data sheets are more useful than broad claims, though real operating conditions can still differ from test conditions. A careful choice starts with the equipment’s actual needs—and with checking details that are easy to overlook.

A high-temperature sealant should be chosen for the joint’s real operating conditions, not just the highest number on a label. Record normal temperatures, startup and shutdown peaks, and how long each peak lasts. A furnace door may face brief radiant spikes, while an exhaust flange endures steady heat and vibration. Those are different jobs. Check whether the stated limit applies to continuous or intermittent use. Heat cycling can harden some materials, while joint movement may cause cracking.
Tip: Map the joint before choosing a sealant. Note the mating materials, gap width, pressure, and exposure to oil, coolant, steam, or combustion gases. A product suited to dry metal may not resist process fluids. Check the technical data sheet for both service temperature and chemical compatibility. Also confirm the required curing conditions. Some sealants may cure poorly if trapped in a hot, sealed assembly. Small detail. Big consequence.
Leave a safety margin below the published maximum. Local hot spots can exceed nearby gauge readings, and bead thickness can affect performance. Clean surfaces carefully, then follow the specified bead size and cure time. If the joint expands significantly, verify that the cured sealant tolerates movement. It is easy to focus on temperature alone; that shortcut misses other failure factors. When failure could cause costly downtime, test a representative assembly.
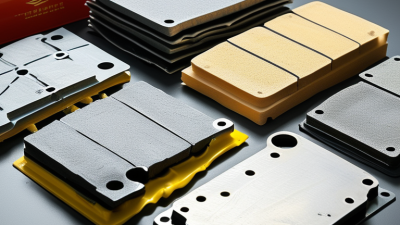
Match the sealant to both the gasket and the surfaces it must bond. Silicone, PTFE, graphite, and fiber gaskets differ in flexibility, porosity, and thermal behavior, so one compound may not suit every joint. Check the sealant’s stated continuous-use temperature, not just its brief peak rating. Also confirm compatibility with the gasket and flange metals; some chemistries can soften a gasket or corrode a surface. Small mismatch. Big leak.
ASTM F104 classifies nonmetallic gasket materials with an 11-digit designation covering properties such as compressibility, recovery, and tensile strength. Use the classification and the gasket maker’s technical data to narrow your choice, then check the sealant supplier’s compatibility guidance. ASME PCC-1 flange-joint guidance also stresses controlled assembly; even a suitable sealant can fail on dirty, oily, or uneven faces. Wipe the flange clean and inspect it under good light. A tiny scratch matters. I would still treat published temperature limits as screening figures, not guarantees: pressure, cycling, and surface finish can change performance in service.
Chemical resistance should be checked against the actual fluid, not a broad label such as “oil resistant.” List every chemical the joint may contact, including cleaners, process fluids, and occasional washdown chemicals. Note their concentration, temperature, and contact time. ASTM F146 provides a recognized way to assess gasket-material changes after fluid exposure, including percentage changes in mass, thickness, and volume. Ask for test data matching your service conditions; room-temperature results may not predict hot exposure. Small differences matter.
Tip: Check compatibility under combined heat and chemical exposure. A sealant may tolerate a fluid when cool but soften, swell, or lose adhesion when heated. Look for documented immersion or aging results, and confirm the tested material matches the sealant formulation you plan to use. Generic charts help narrow choices, but they are not proof.
Required performance matters just as much. Define the operating temperature, pressure, movement, and expected service interval before comparing products. ASTM F36 measures gasket compressibility and recovery, useful indicators when a sealed joint must withstand compression changes. They do not, on their own, establish chemical compatibility. Ask for the test method, exposure conditions, and measured results. A tidy lab coupon can still miss a rough flange or uneven application. That deserves a second look.
| No. | Selection Tip | What to Check | Practical Evaluation |
|---|---|---|---|
| 1 | Match the real temperature exposure | Check the sealant’s stated continuous-use temperature and any separate intermittent or peak limit. Consider start-up, shutdown, hot spots, thermal cycling, and the temperature at the joint—not just the equipment’s nominal operating temperature. | Compare the expected joint temperature profile with the product’s technical data sheet. Confirm whether the rating applies after full cure and whether repeated heat cycles affect the seal. |
| 2 | Verify chemical compatibility | Identify every fluid the seal may contact, including oils, fuels, coolants, water, solvents, process chemicals, and cleaning agents. Compatibility can vary with concentration, temperature, exposure time, and sealant chemistry. | Request compatibility data for the specific chemical and service conditions. If data is unavailable, consult the manufacturer and consider a controlled immersion or service-representative test; do not infer resistance from a general “chemical resistant” claim. |
| 3 | Choose a product suited to the joint design | Determine whether the joint uses a formed-in-place sealant, a pre-cut gasket, or a sealant used with a gasket. Check the flange material, surface finish, gap size, flatness, and whether the joint must be disassembled later. | Confirm that the product is intended for the joint type and allowable gap. Do not use a sealant to compensate for damaged, badly warped, or incorrectly fitted flanges unless its documentation specifically permits it. |
| 4 | Check pressure and mechanical demands | Assess operating pressure, pressure fluctuations, vibration, movement, bolt loading, and the consequences of leakage. Temperature capability alone does not establish pressure capability or suitability for a particular flange assembly. | Look for application-specific pressure and joint-performance guidance. Confirm required flange preparation, bead dimensions, assembly torque, and whether the sealant is suitable for the expected movement and vibration. |
| 5 | Confirm cure requirements and assembly time | Review the required surface preparation, application temperature, skin time, assembly window, and full-cure time. Cure behavior may depend on bead thickness, humidity, temperature, and whether the sealant is exposed to air. | Plan assembly and return-to-service timing using the technical data sheet. Check whether the parts can be assembled immediately, must remain undisturbed, or require a specified cure period before exposure to heat, pressure, or chemicals. |
| 6 | Check substrate and service compatibility | Verify suitability for all joint materials, such as steel, aluminum, cast iron, or coated surfaces. Consider corrosion risk, electrical or sensor components nearby, and whether uncured material could enter oil passages or other sensitive areas. | Consult the product documentation for substrate restrictions and preparation instructions. Use only the amount needed to form the seal, and follow guidance on keeping excess material out of the system. |
| 7 | Use documented performance and safety information | Review the current technical data sheet and safety data sheet. Check test conditions, application limits, storage life, handling precautions, and any relevant industry or equipment-specific requirements. | Compare documented test conditions with the actual service environment. Treat ratings as conditional on the stated materials, preparation, cure, and test method; seek engineering approval for safety-critical or regulated applications. |
Choosing a high-temperature gasket sealant means matching the joint, heat exposure, and service conditions—not just the maximum temperature on a label.
Tip 1: Check whether the joint is rigid or moves during thermal cycles. ASTM C920 assigns movement classes such as Class 25 and Class 50, indicating movement capabilities of 25% and 50% of joint width. Those figures apply to building-joint sealants, not gasket sealants; do not treat them as heat ratings.
Tip 2: Confirm continuous and intermittent temperature limits, plus compatibility with the metal, fluid, and pressure involved.
Tip 3: Compare cure requirements with your assembly schedule. A surface that feels dry may conceal uncured material inside a deep joint. Follow the specified bead thickness, ventilation, and cure time before pressurizing equipment.
Tip 4: Check application details: nozzle access, surface cleanliness, and whether the sealant needs a formed gasket or a thin film. A clean, even bead matters.
Tip 5: For maintenance, ask how removal affects the flange and what inspection interval suits the operating cycle. ASTM test data cannot replace equipment-specific checks.
A tidy installation can still fail if curing or joint movement was overlooked. I’d verify those details twice.
Before selecting a high-temperature gasket sealant, check its technical data sheet and safety data sheet. Confirm the stated temperature limit, cure conditions, and compatible surfaces match your actual application. A maximum temperature may describe brief exposure, not continuous service. That distinction matters.
Verify any listed safety standard or certification applies to the specific product and intended use. Do not treat a certification mark as proof that every installation is safe. Read handling guidance for ventilation, gloves, and eye protection, especially when working in a confined area. Paperwork matters. Check whether the instructions specify approved substrates, joint preparation, and chemical exposure limits. If the documents are unclear, ask the manufacturer for written clarification rather than guessing.
Before applying sealant, make sure the equipment is shut down and cool enough to handle safely. A clean flange should feel dry and show no loose rust or old residue. Follow the stated bead size and curing time; rushing the cure can weaken the seal. Keep the product label and batch details with the maintenance record. This step can feel fussy, but it helps when a repair needs review later. Even careful checks cannot correct a damaged flange, and that is easy to overlook.